Skip the Scanner: My DIY Copy Stand Setup
Introduction
As someone who shoots film regularly, I used to rely on local photo labs to handle the scanning process. While that worked for a while, the rising cost of high-resolution scans quickly became a barrier — especially as I began shooting more and wanting better control over the final image.
So I decided to bring scanning in-house — not with a flatbed, but by building a camera scanning setup from scratch. The first step? A rock-solid, adjustable copy stand.
This post walks through how I built my own DIY copy stand, with photos of the build, a parts breakdown, and some tips I learned along the way.
Why Not Use a Flatbed Scanner?
Flatbed scanners like the Epson V600 or V850 are common tools for digitizing film, especially for medium format or high-volume scanning. And for many photographers, they’re good enough. But after looking into the process, I found more limitations than advantages for what I needed.
Flatbed Scanner Pros:
Plug-and-play simplicity: Easy to set up and operate
Batch scanning: Some models can scan multiple frames at once
Affordable entry point: Basic models are less expensive than pro-level cameras and lenses
Flatbed Scanner Cons:
Lower sharpness: Even high-end flatbeds struggle to match the resolution of a good digital camera and macro lens
Limited dynamic range: Highlights and shadows can suffer, especially in color negatives
Slower workflow: Scanning, previewing, and adjusting each frame takes time
Bulky footprint: Takes up space even when not in use
Software headaches: Driver issues and dated scanning software are common
Ultimately, I realized that camera scanning gives me more control, better sharpness, and a more intentional workflow — especially since I already had experience with digital cameras.
Why Build a Copy Stand?
A good copy stand is the foundation of any camera scanning rig. It keeps your camera perfectly perpendicular to the film plane and ensures rock-solid stability — which is essential when you’re shooting at macro distances and trying to digitize fine film grain.
Store-bought options are either expensive, overbuilt, or not quite right for film scanning needs. I wanted something:
Sturdy (no flex or shake)
Adjustable (for height and alignment)
Modular (so I could change or upgrade parts over time)
Cost-effective (to save budget for lenses and film holders)
That led me to T-slot aluminum extrusion — lightweight, strong, and easy to assemble into whatever shape you need.
Assembly Highlights
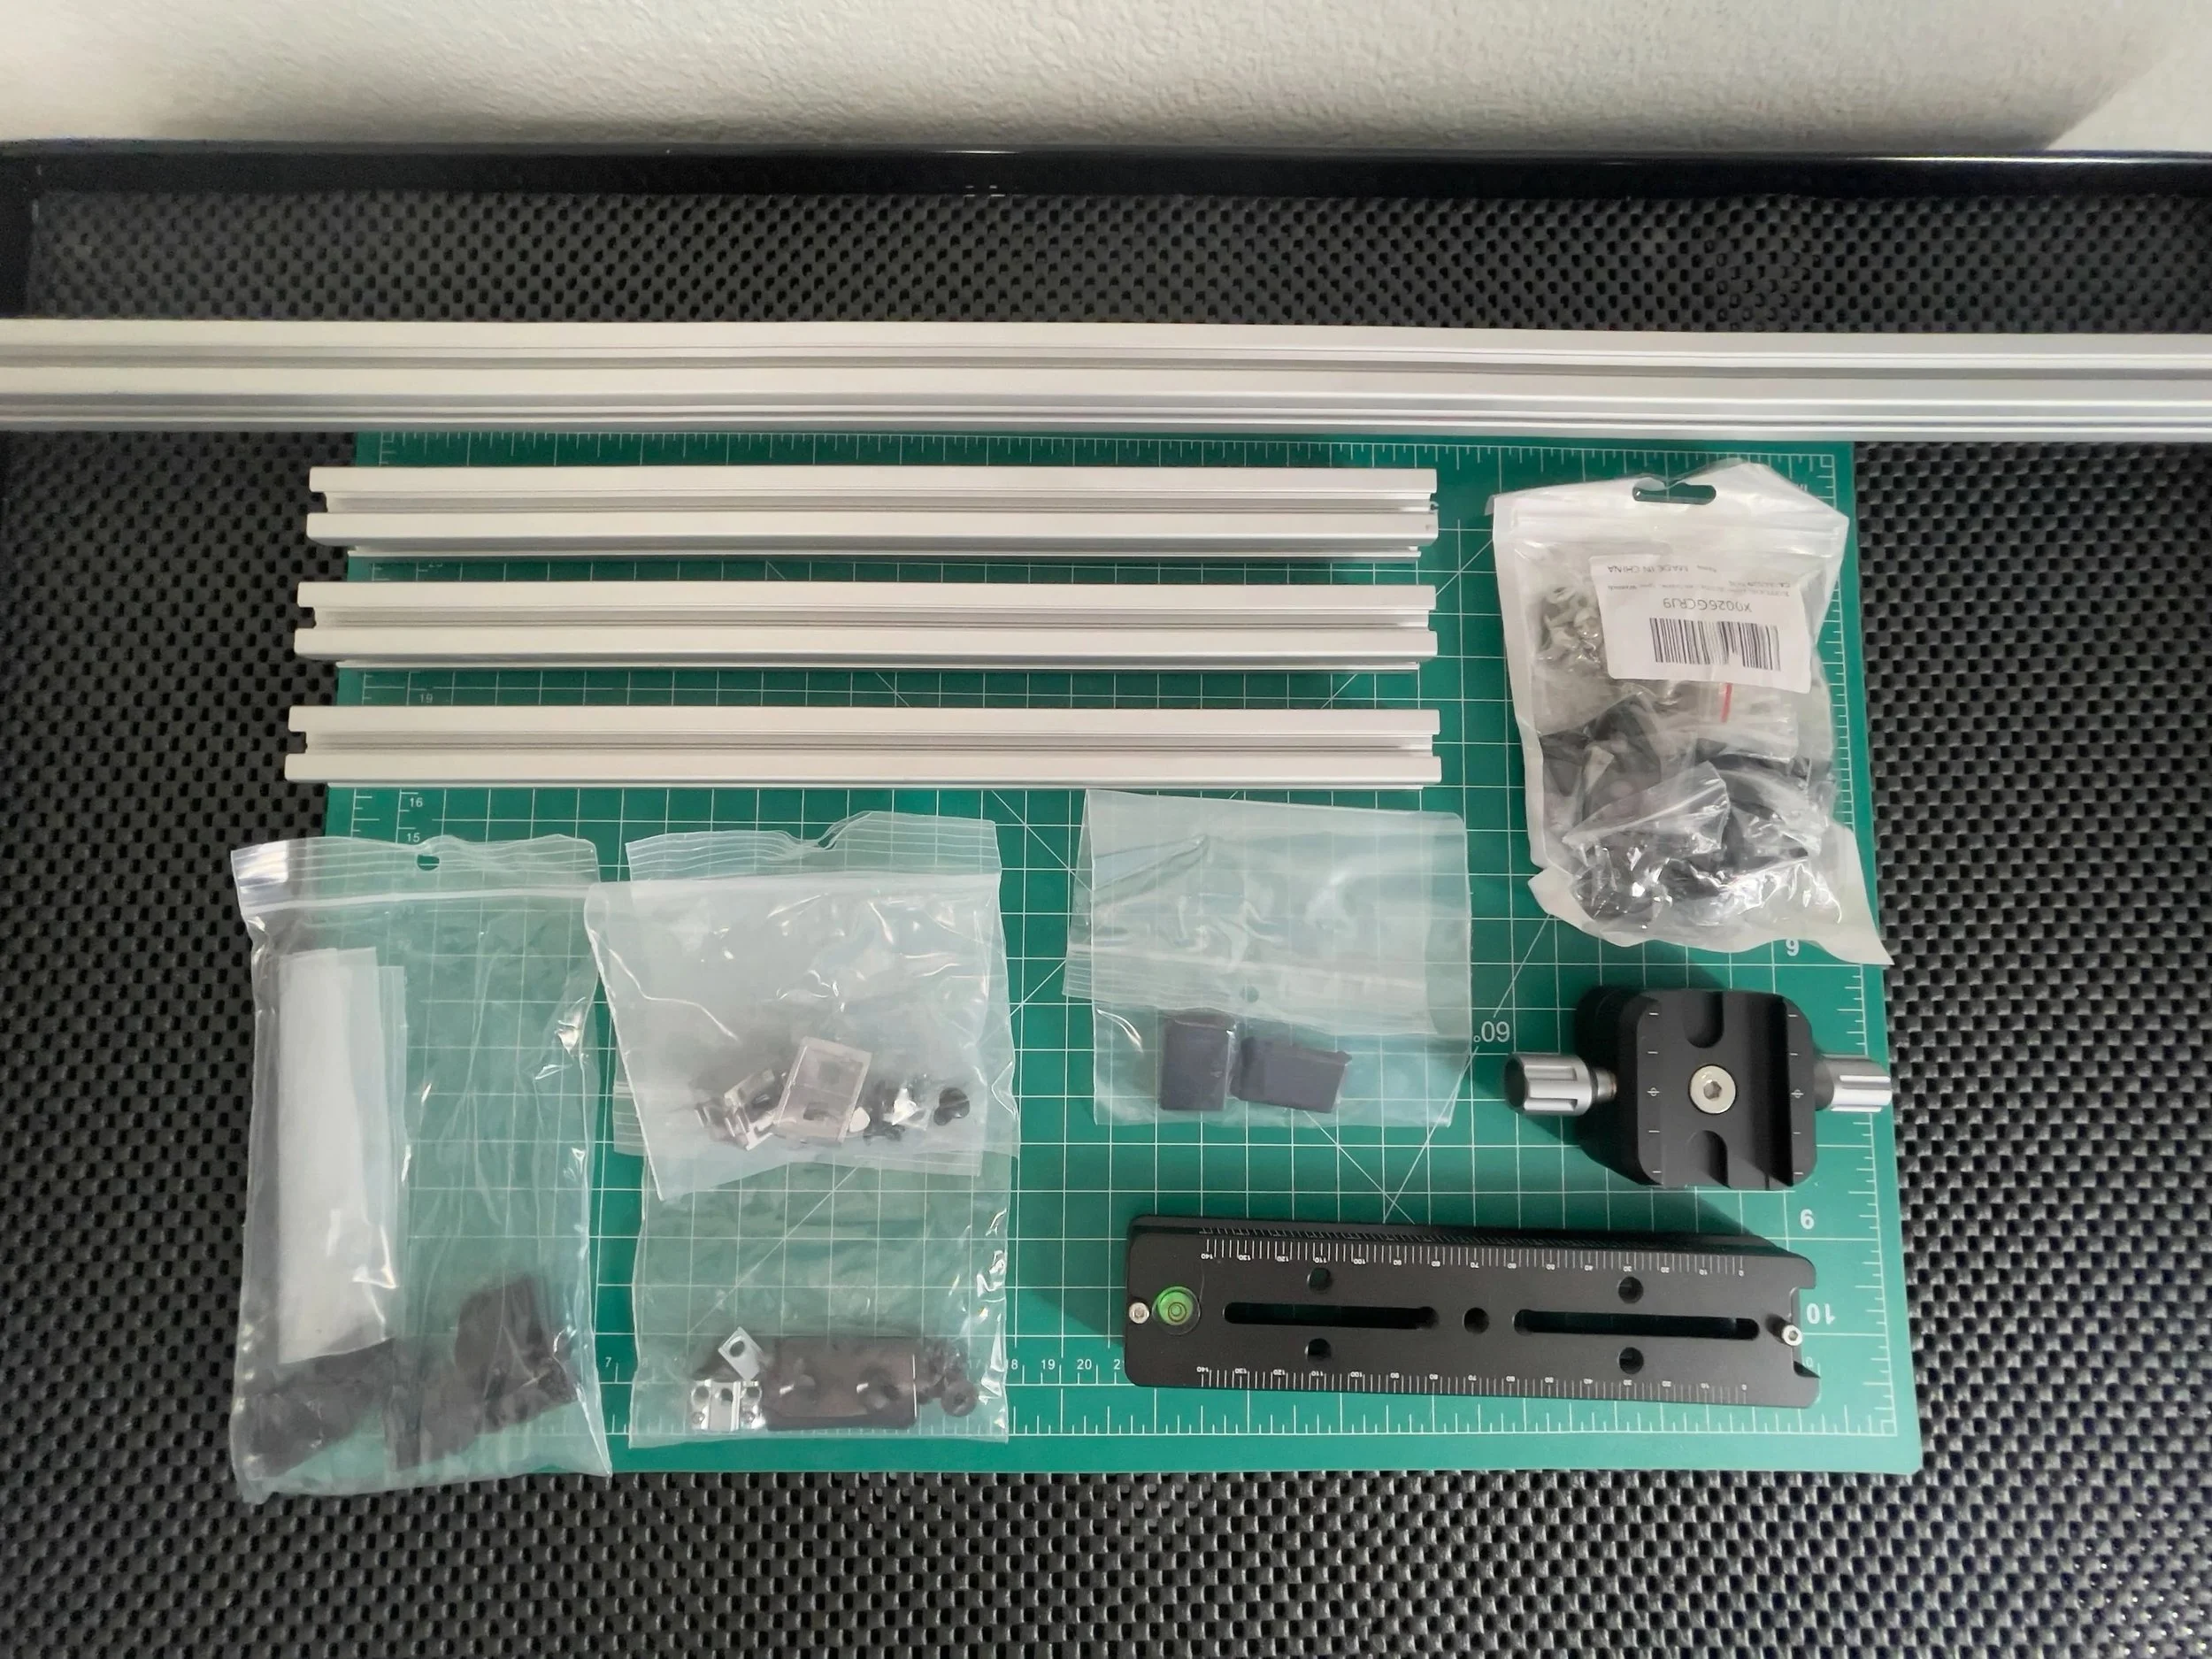
Here’s how the build came together using T-slot aluminum and a few hardware essentials:
Parts Used:
3x 12” 2020 aluminum extrusions (short)
1x 31” 2020 aluminum extrusion (tall vertical post)
6x Black plastic end caps
1x 10 Set 2020 Series 2 Hole 90 Degree Inside Corner Bracket Kit
2x Plastic caps for brackets
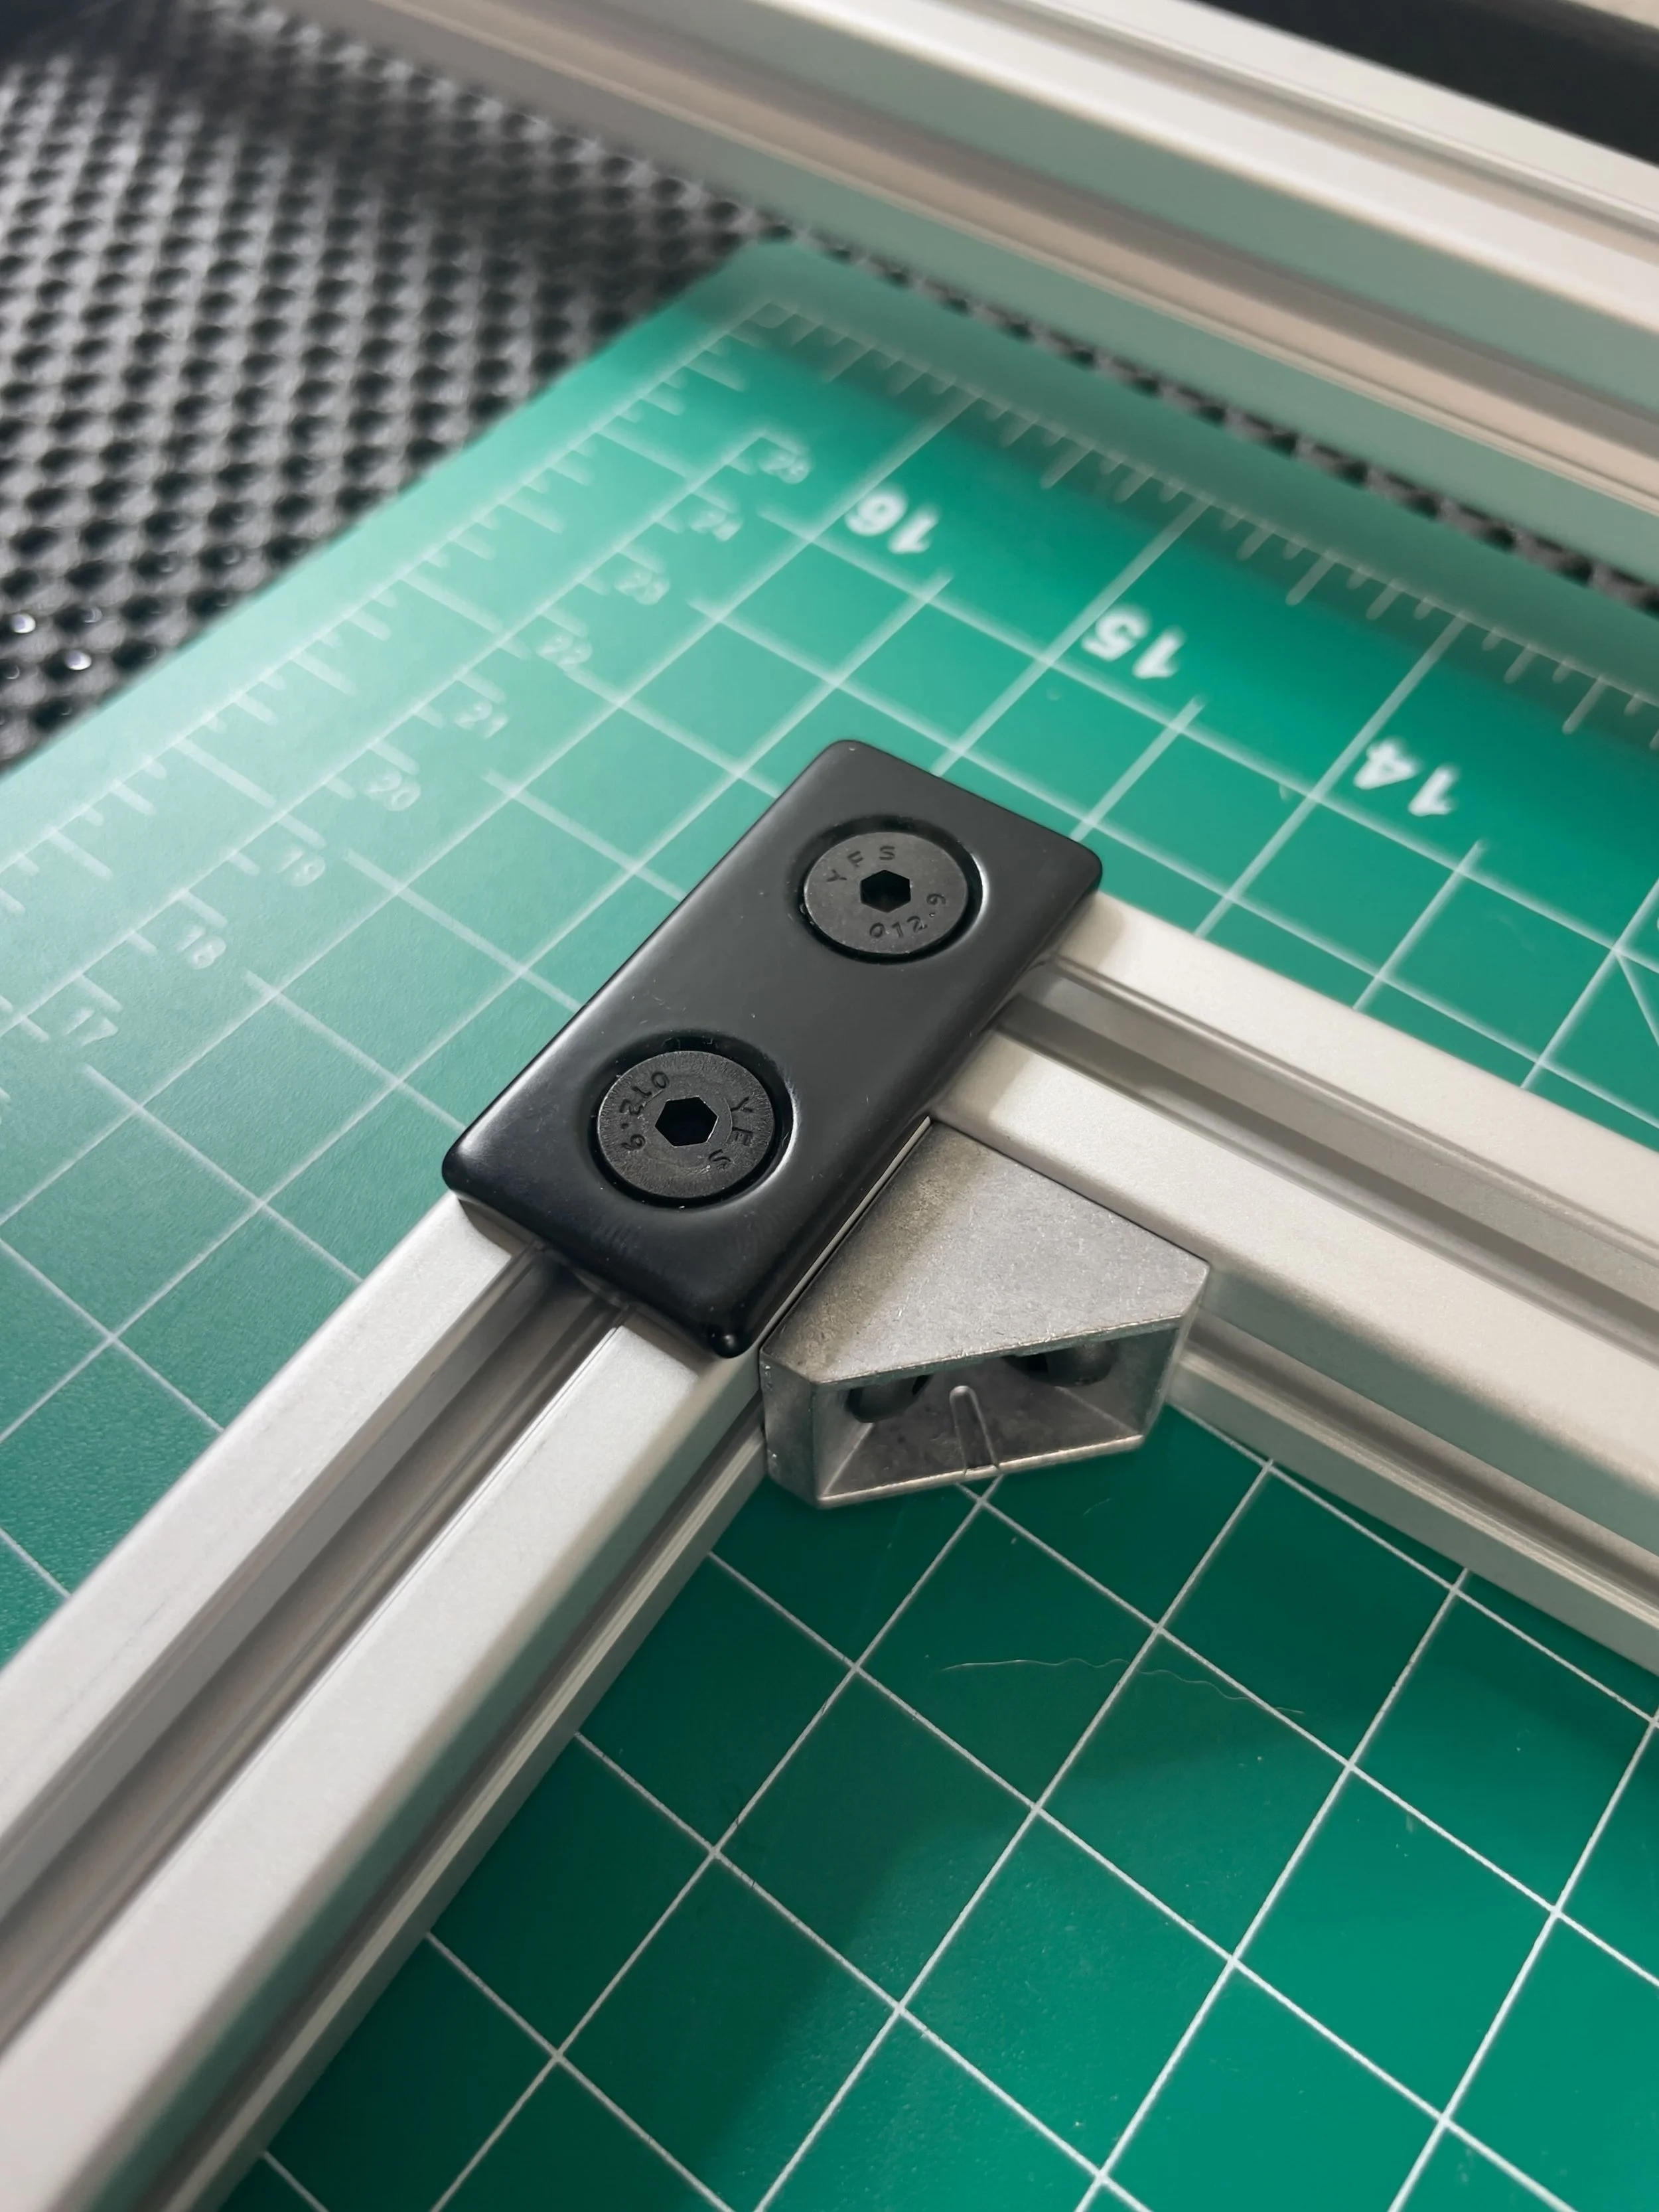
2x Flat joining plates (with mounting hardware)
2x Drop-in T-nuts with spring-ball (to secure the macro rail)
1x Koolehaoda 180mm Rail Nodal Slide Metal Quick Release Clamp (macro rail)
Assembly Steps:
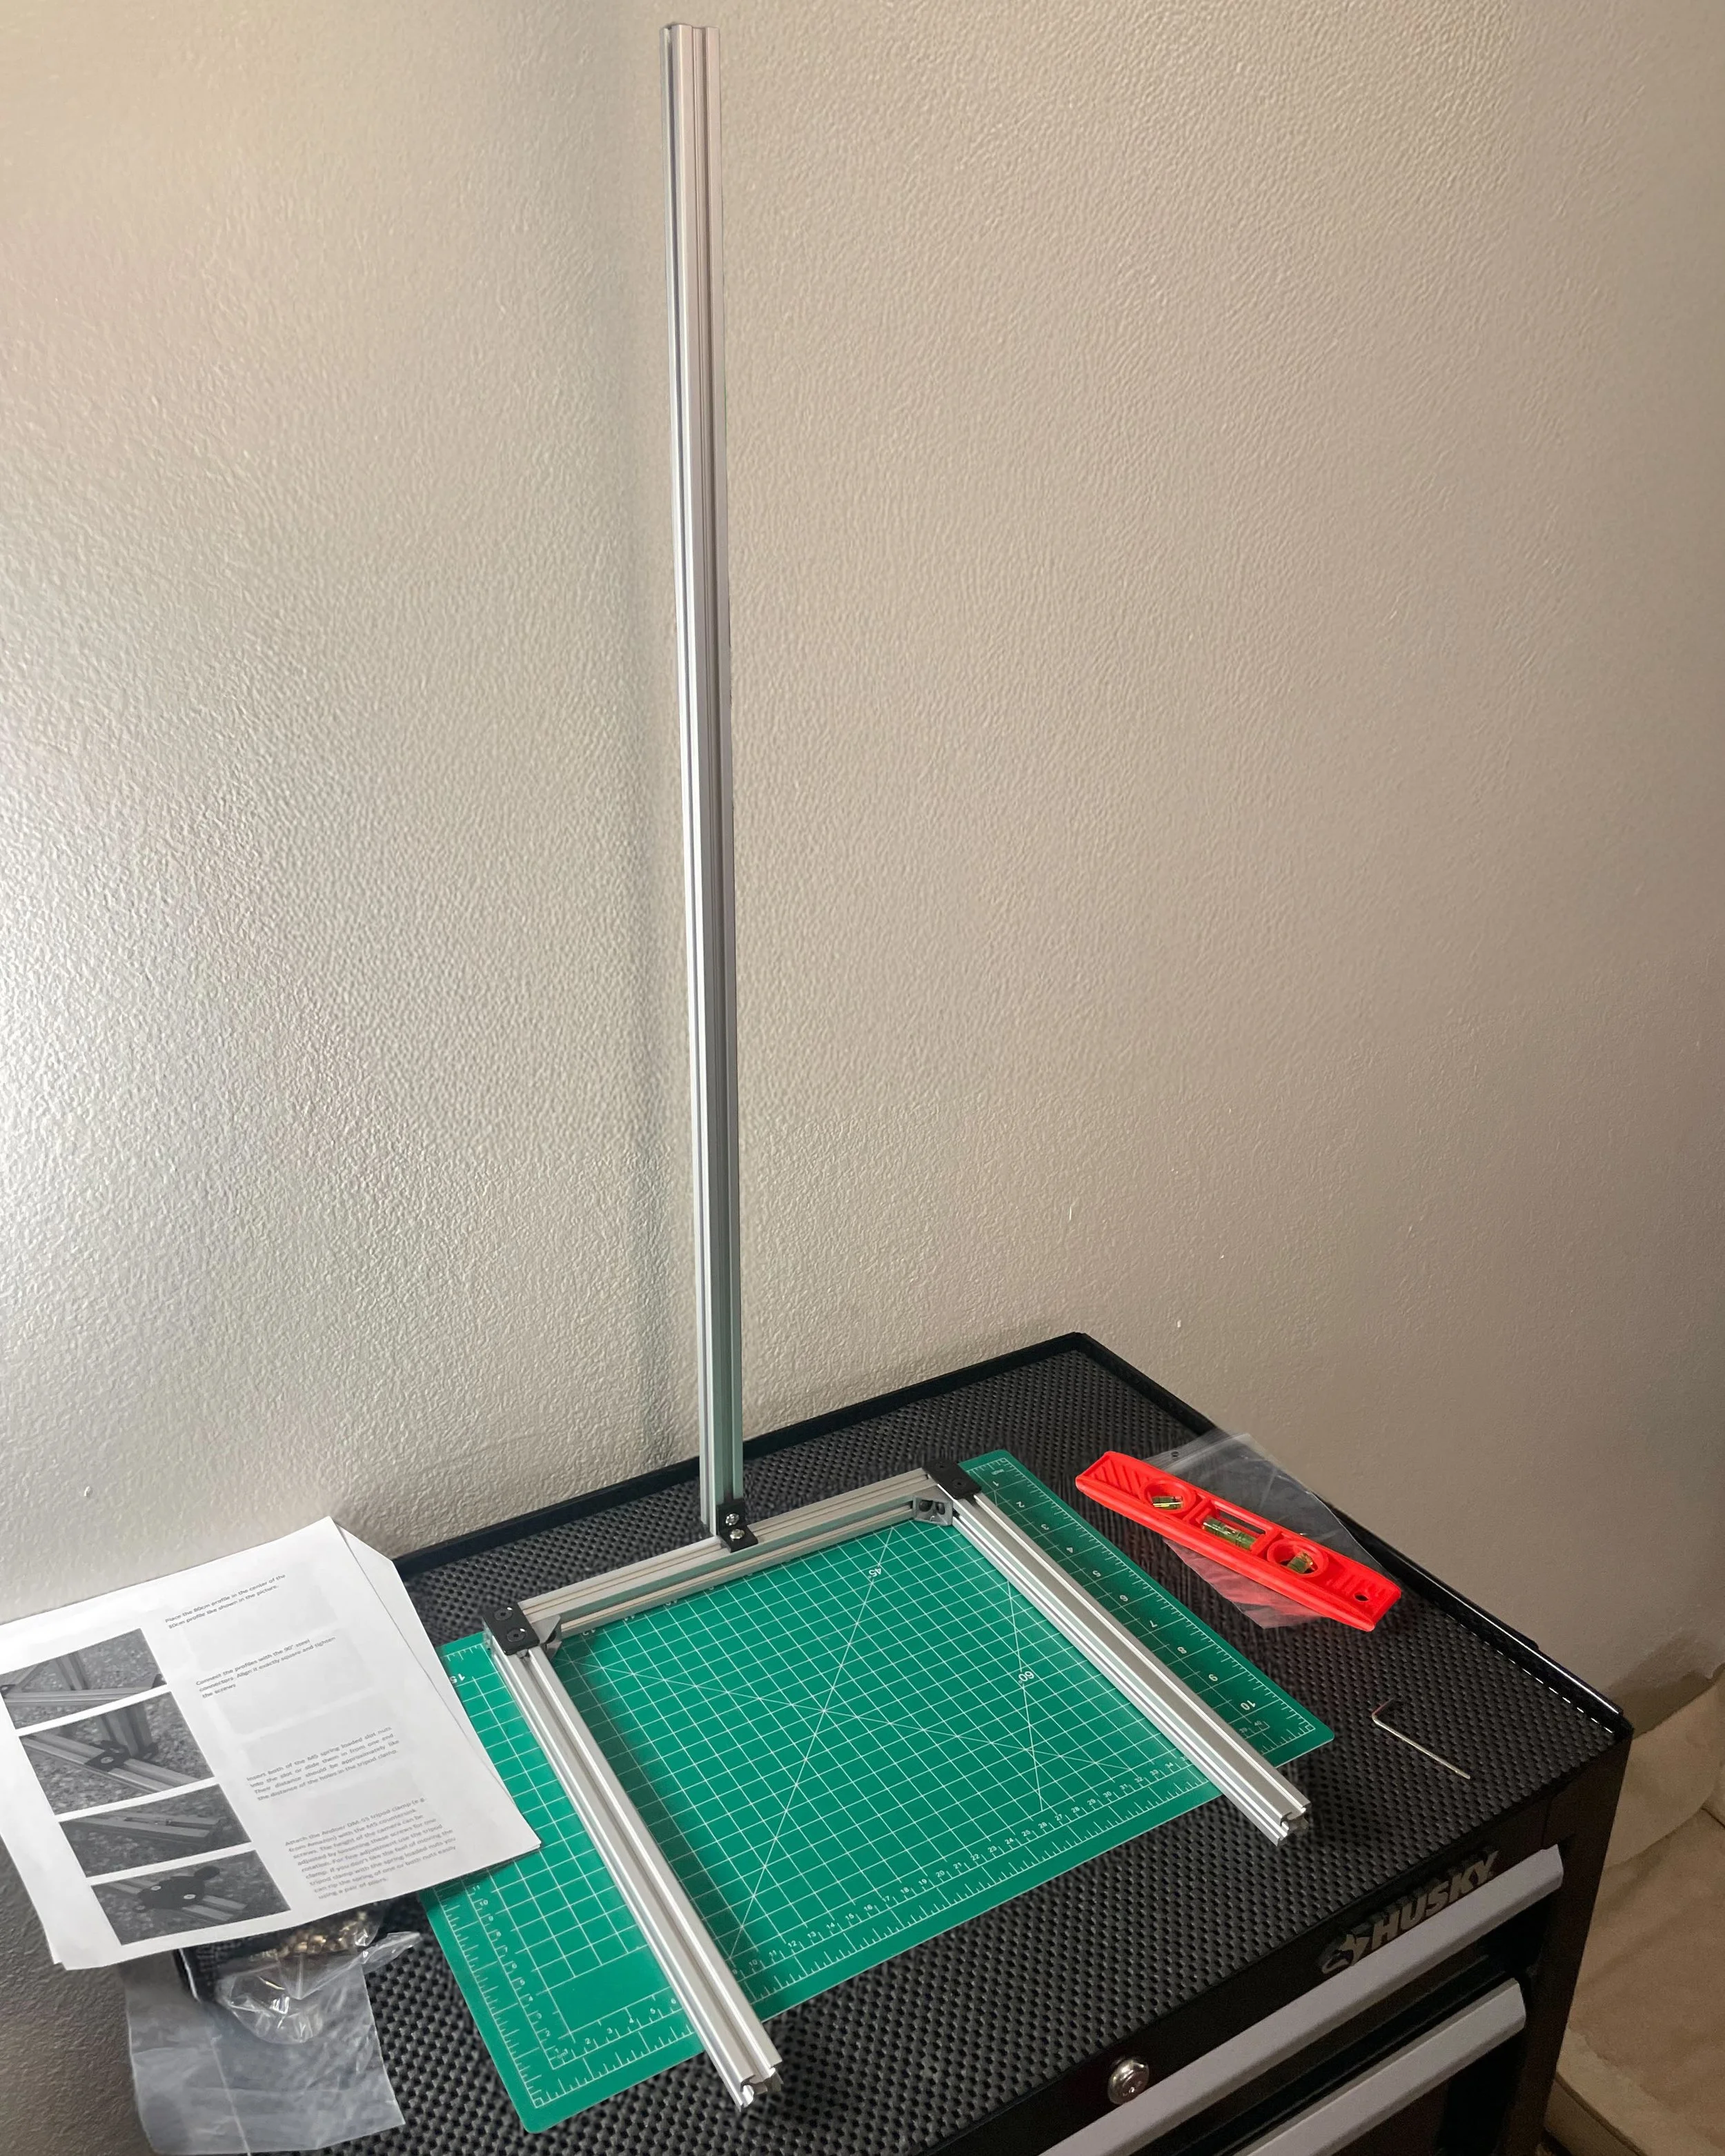
Keep all joins slightly loose during the build — this gives you room to make adjustments before locking everything in.
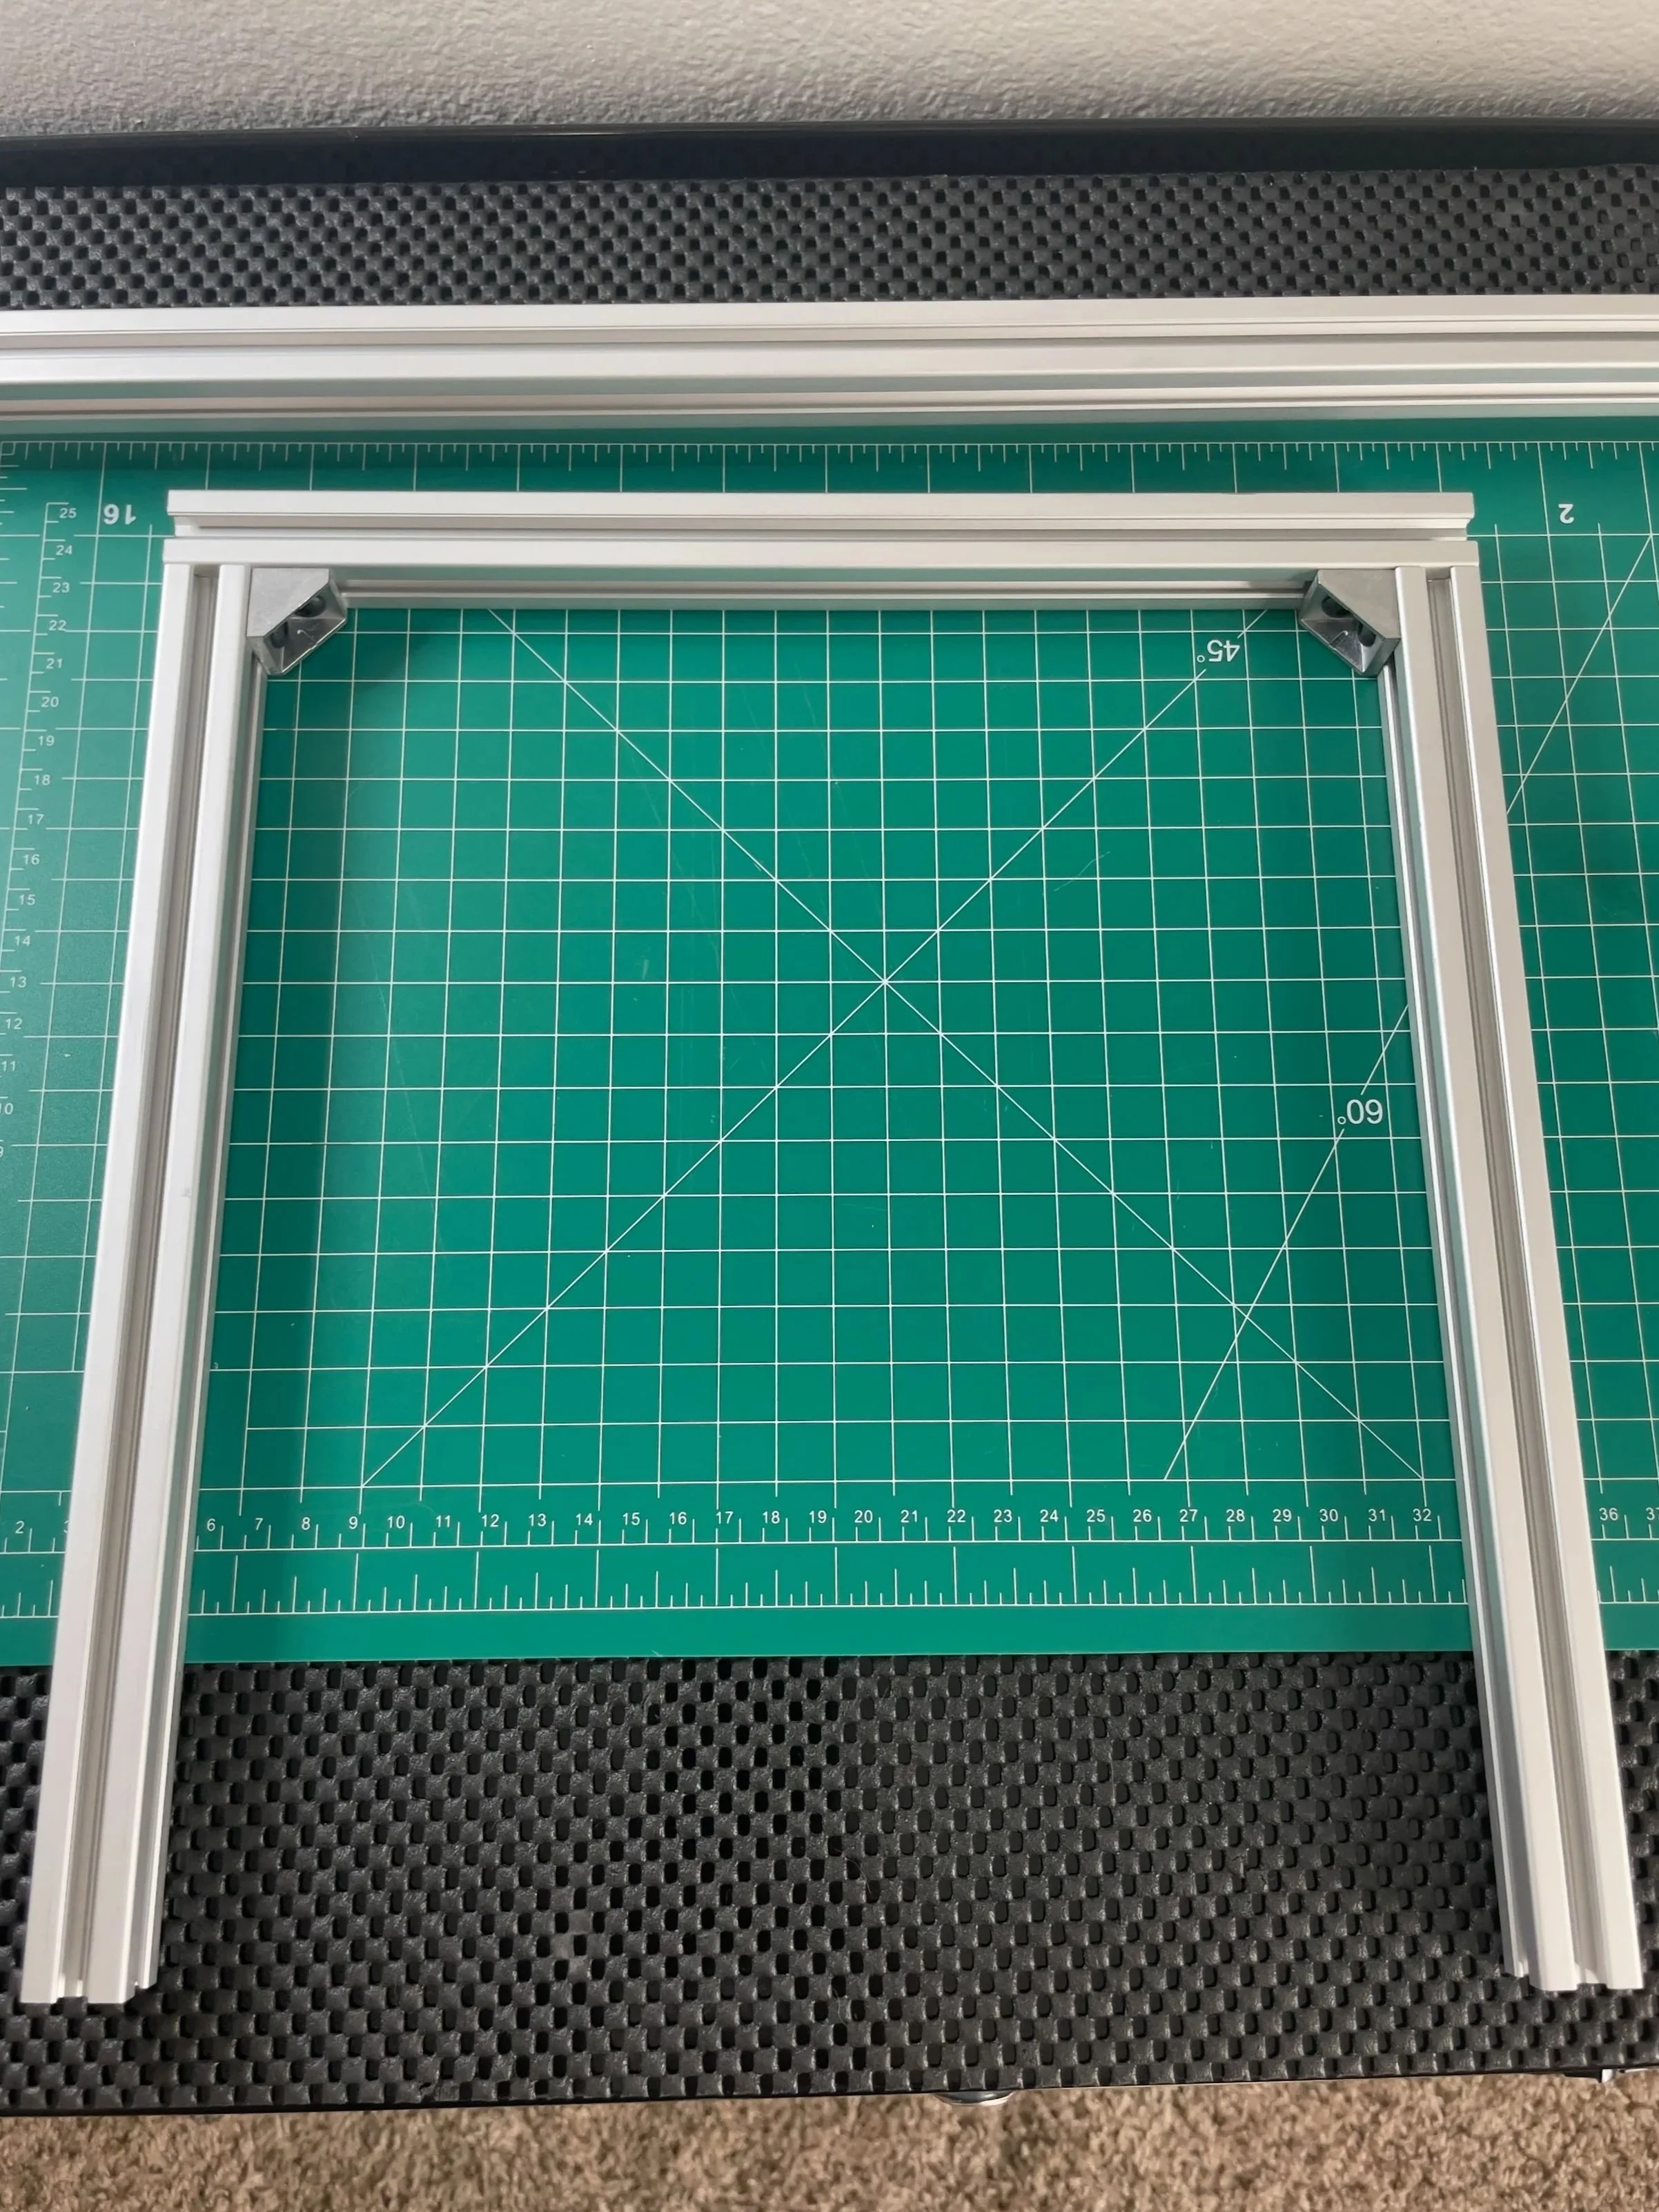
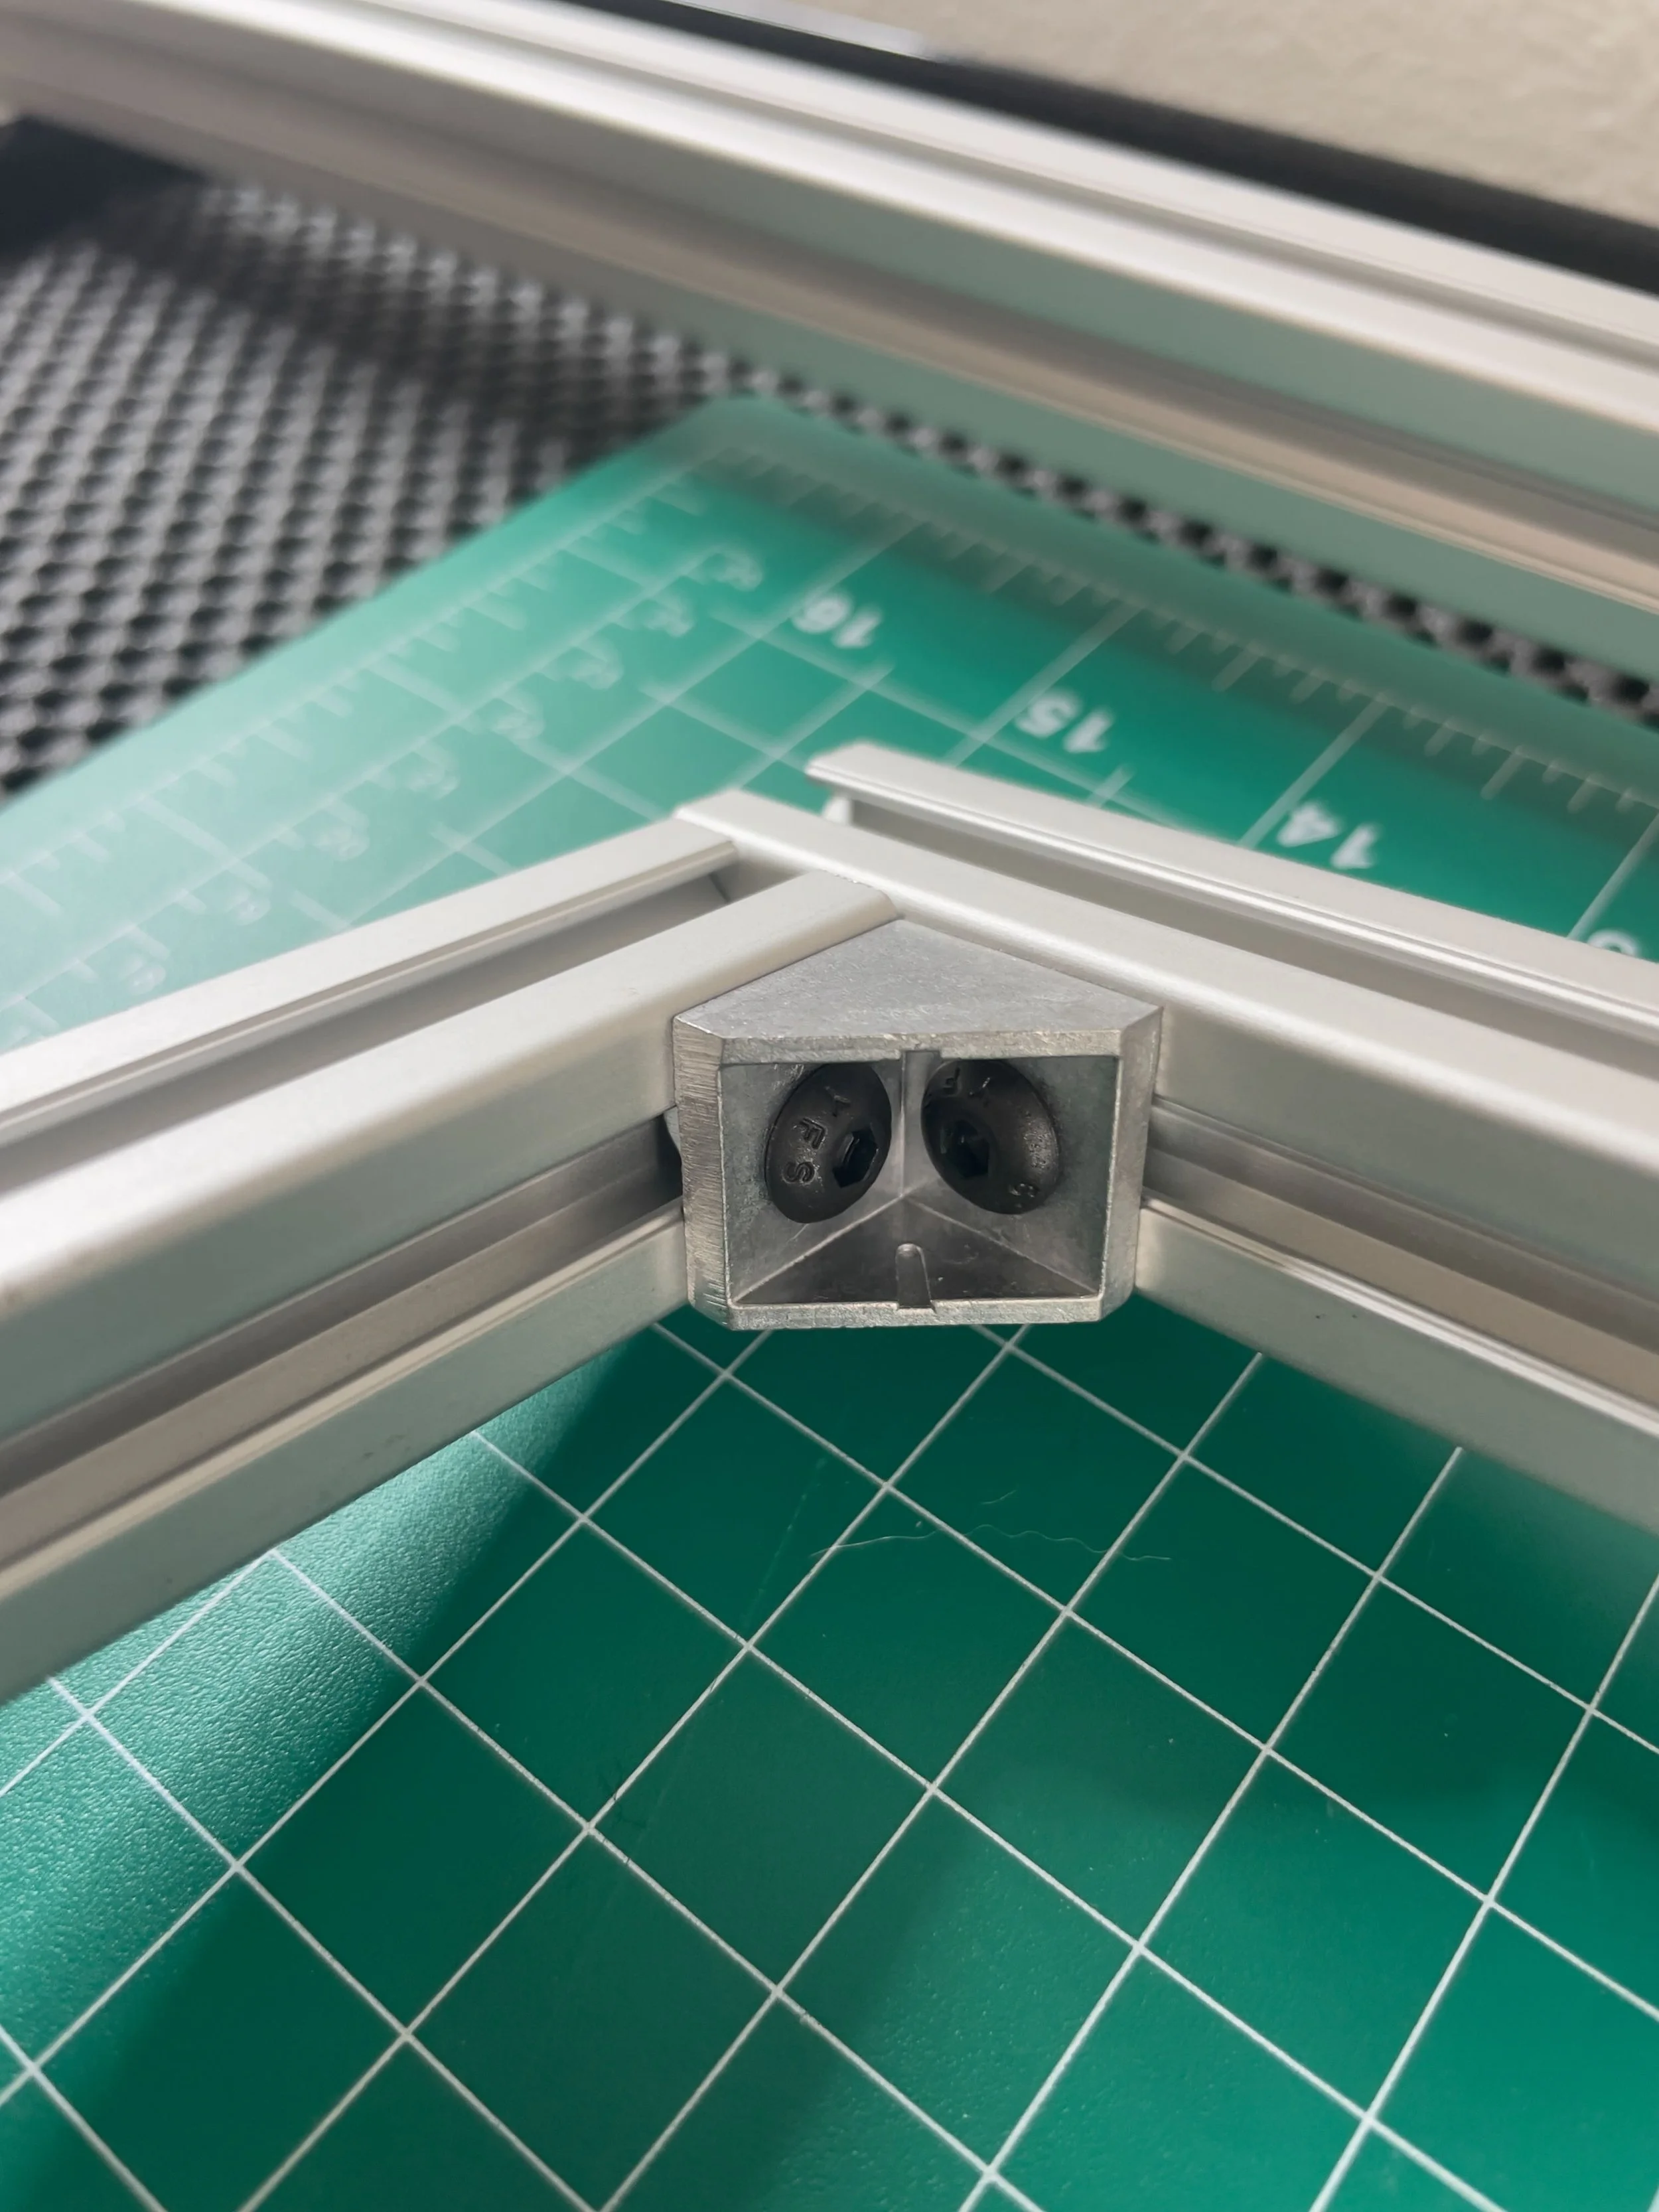
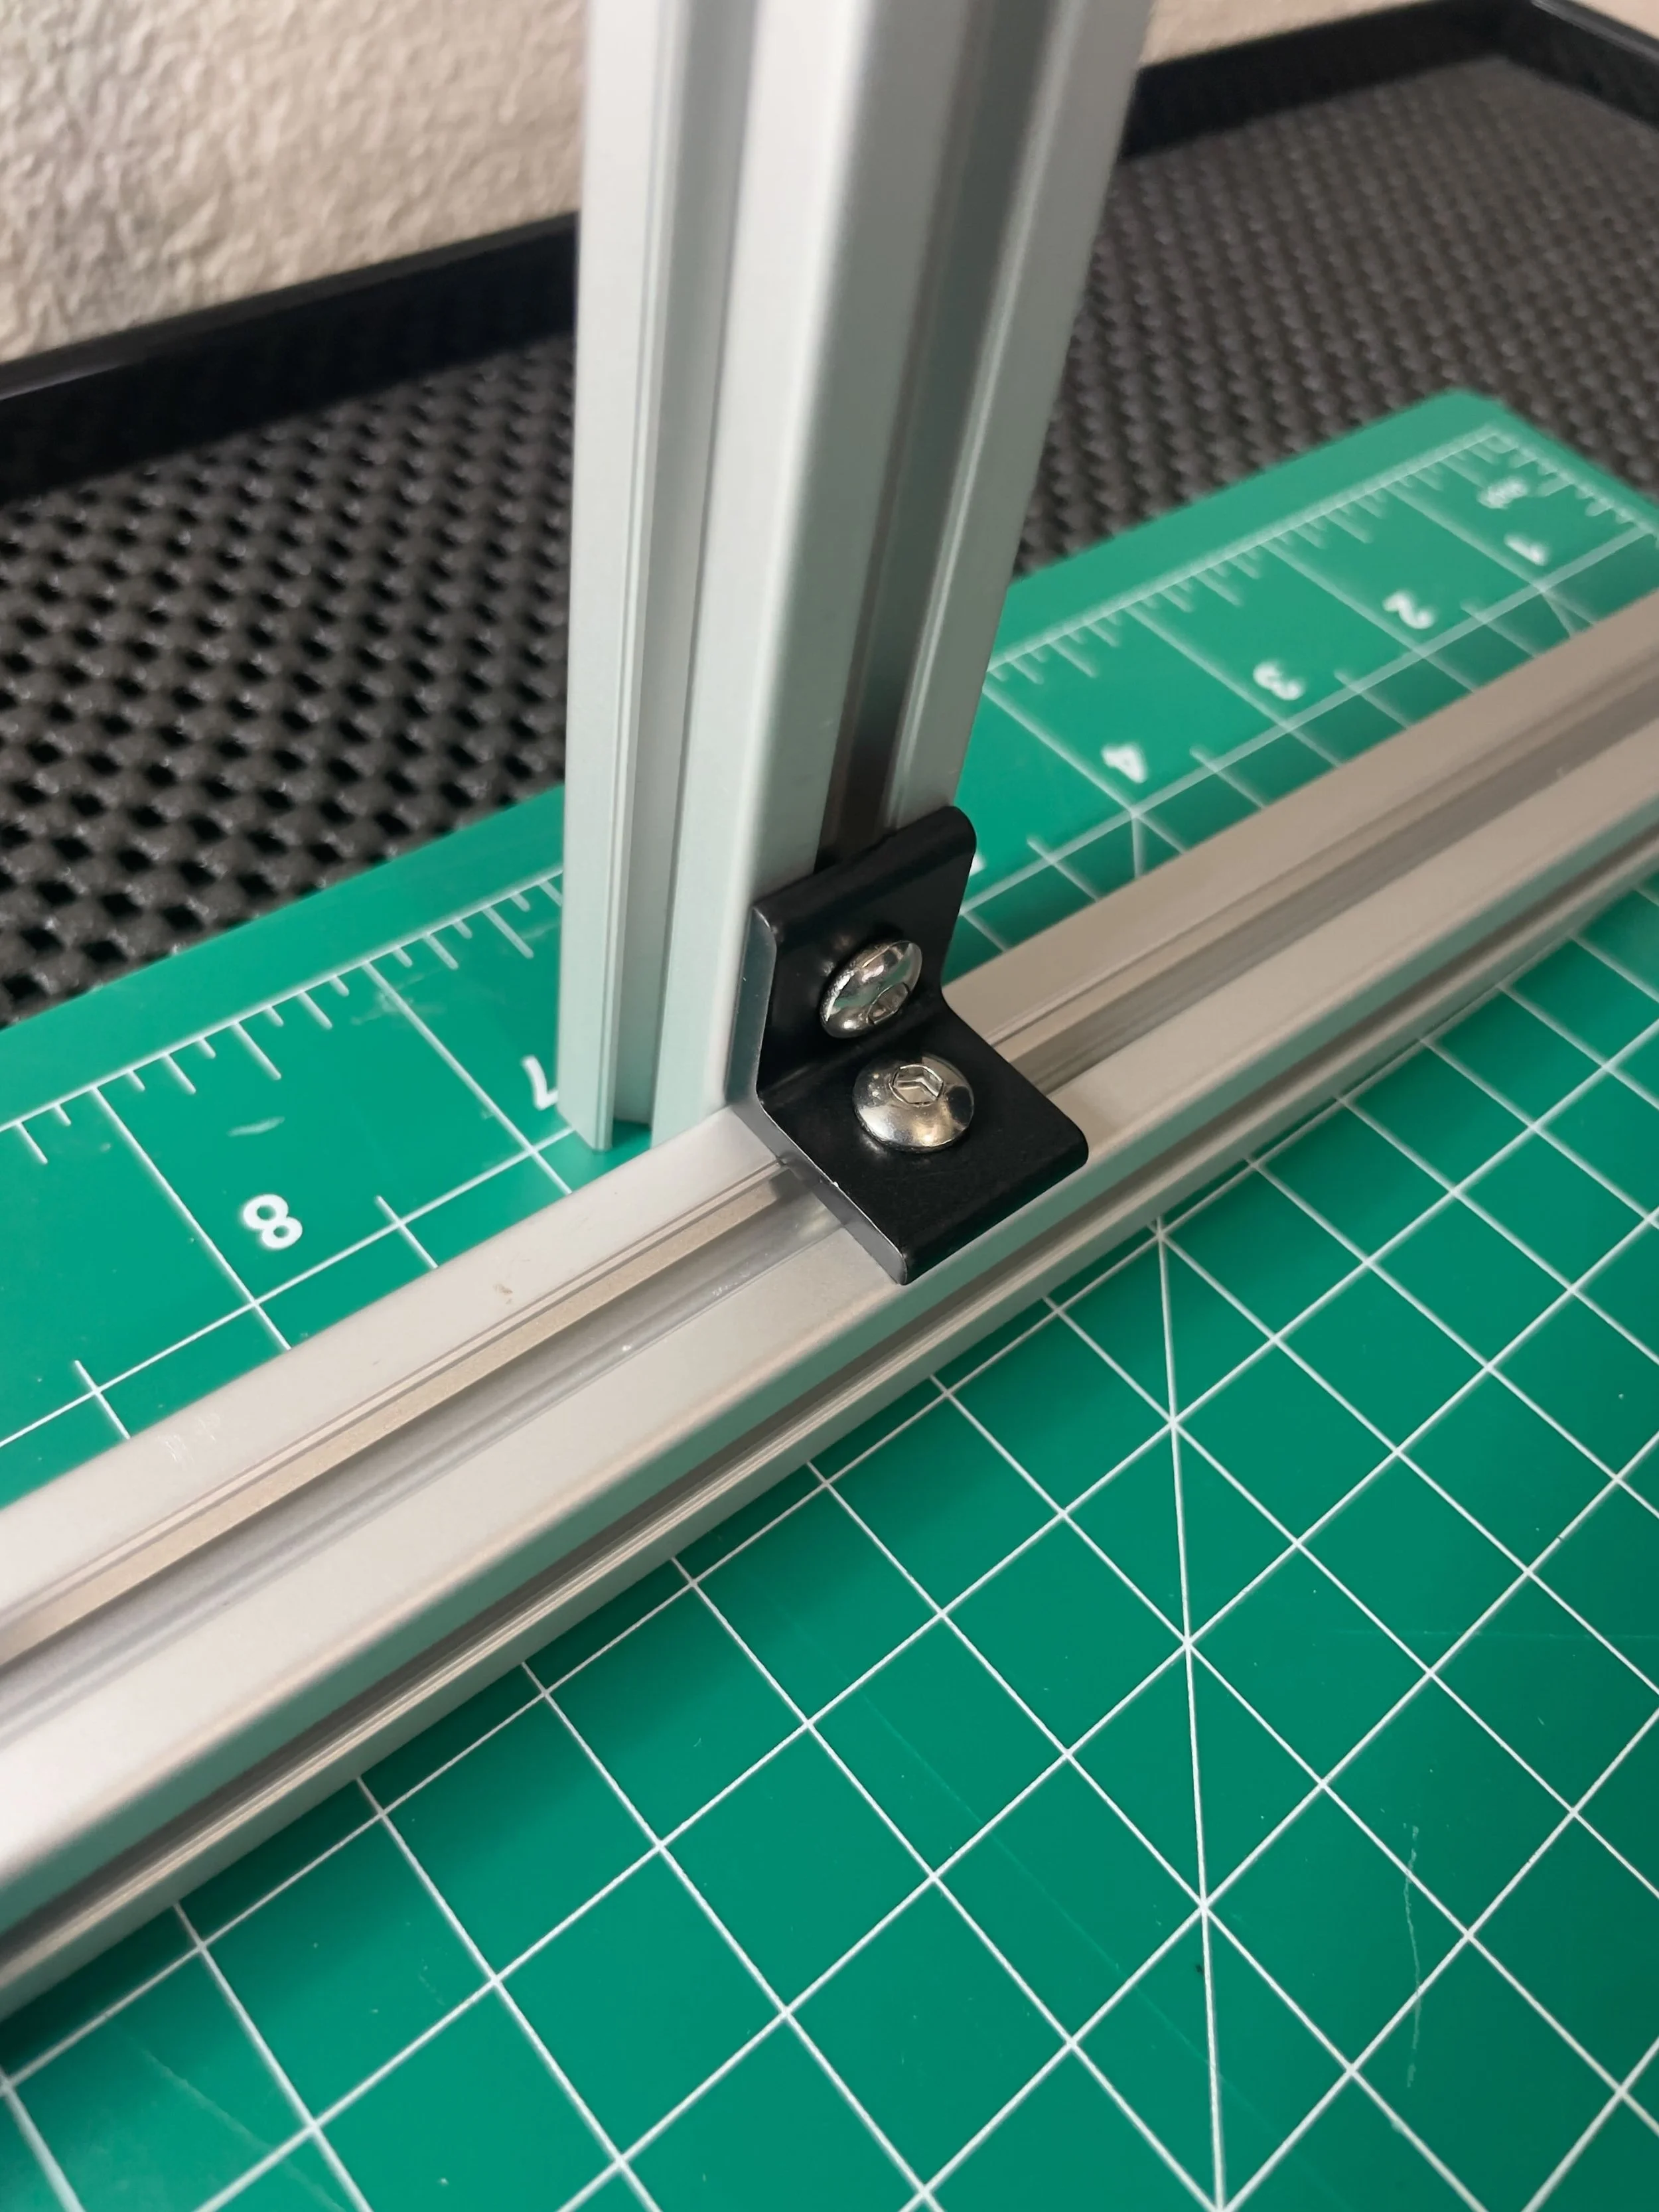
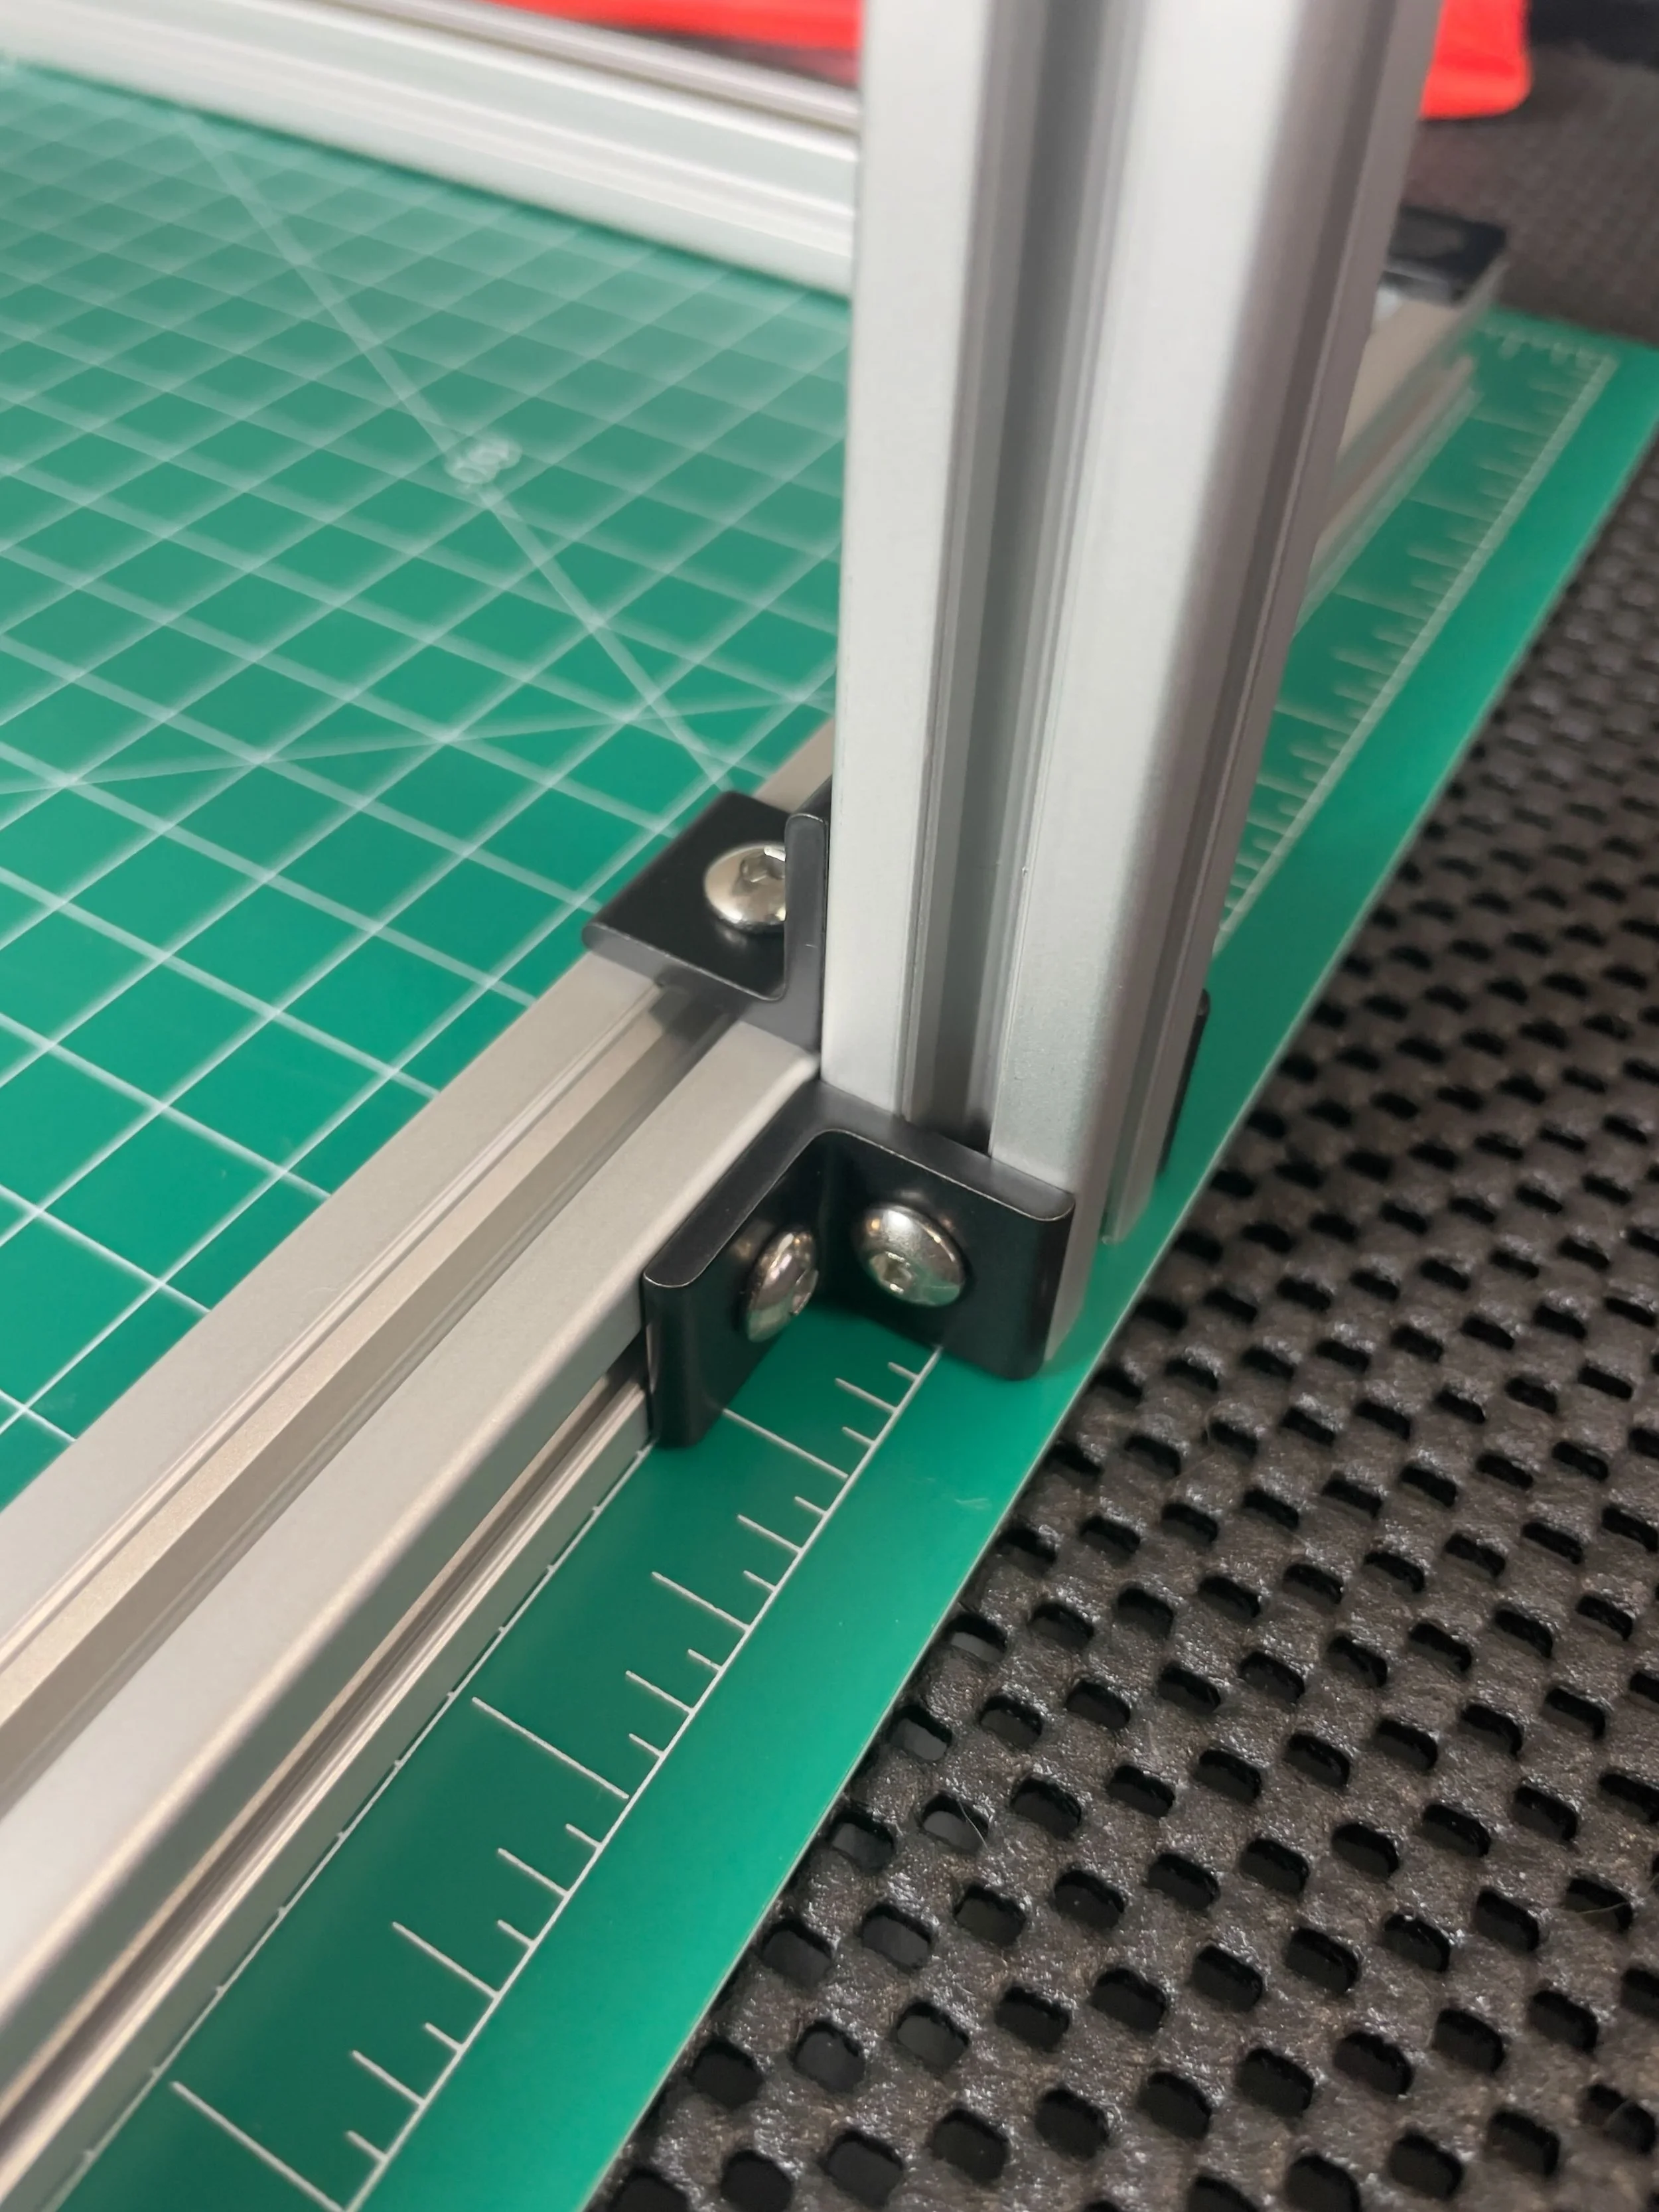
Form the base by joining the three 12” extrusions into a U-shape using the inside corner brackets from the kit.
Add the flat joining plates at each rear corner to reinforce the base and reduce flex.
Center the 31” vertical extrusion at the back of the U-shape. This upright will eventually support your camera, so alignment and strength are key.
Secure the upright post using one inside corner bracket on the front and two more on the back. This triple-bracket configuration keeps everything steady.
Install the drop-in T-nuts into the front-facing T-slot of the vertical post. These allow you to mount and adjust the macro rail.
Cap the ends of each extrusion and bracket with the black plastic pieces for a finished, finger-friendly build.
For stability, I added felt floor protectors (cut into squares) to the corners of the base — simple and effective for reducing vibration and slipping.
💡 Tip: If you're replicating this, orient the vertical T-slot forward so it’s easy to attach your macro rail or sliding carriage.
First Impressions
Even before mounting the camera, the stand felt solid and professional. No wobble, no flex — just clean lines and smooth adjustability. It’s exactly what I was hoping for: a dependable foundation for DSLR scanning that feels purpose-built without the boutique price tag.
What’s Next?
In the next post, I’ll cover how I chose a macro lens for scanning.
I’ll also start sharing early test scans, including a few done with 3D-printed film holders (and what I learned from them).
If you’re considering building your own scanning rig and want a closer look at measurements or parts sources, I’m happy to share.
See you in the next post.
— Steven
Hollyridge Photography
Follow us on Instagram or Facebook. Check our Print Shop for prints and our Etsy Store for digital downloads.