Upgrading to Negative Supply Film Holders for DSLR Scanning
After a few months of scanning with 3D printed film holders, I started running into problems that were slowing me down and impacting scan quality. The DIY approach was a fantastic way to learn, but it came with compromises. Eventually, I decided it was time to invest in something more refined — and that’s when I upgraded to Negative Supply’s 35mm scanning system.
The Limits of 3D Printed Holders
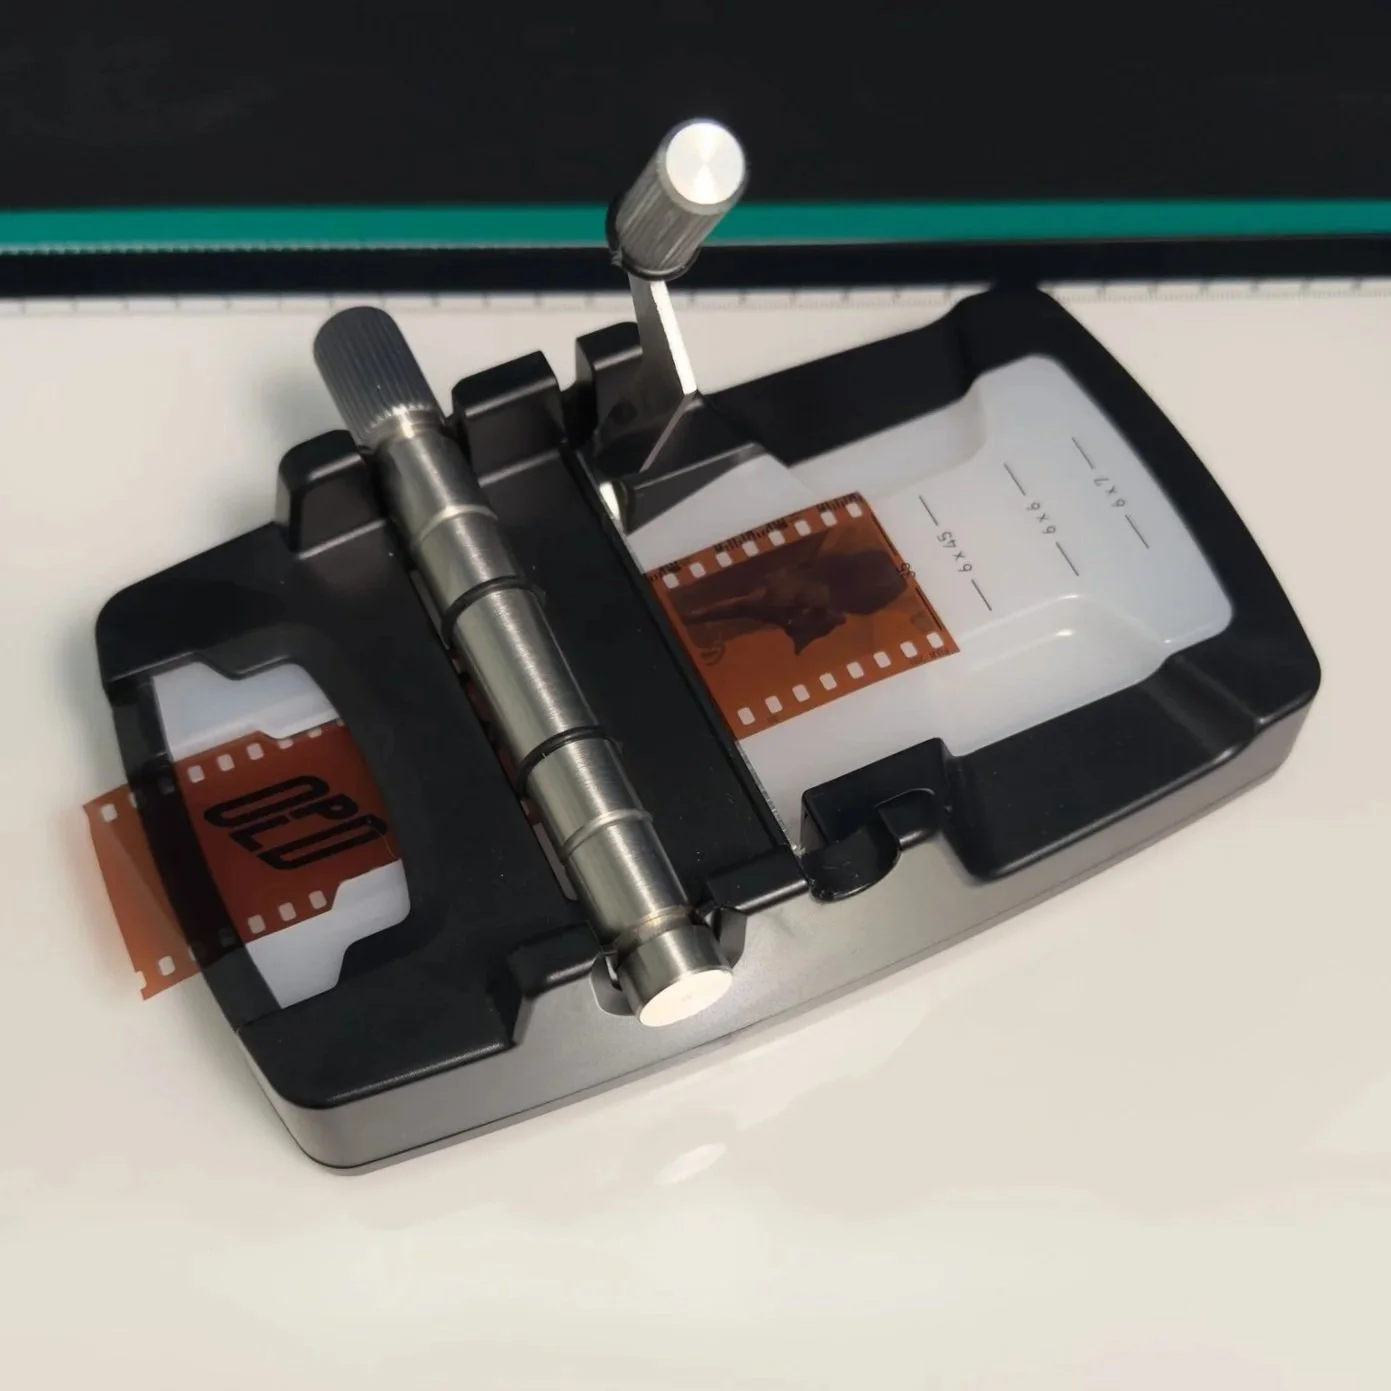
Optik Oldschool Film Killer
Open-source designs made it easy to get started, but there were some real challenges:
Inconsistent build quality — relying on third-party printers meant the holders weren’t as precise or smooth as I needed.
Scratches on film — rough print edges were leaving small marks, which is unacceptable for archival scanning.
Difficult loading — fine for uncut rolls, but most of my film was already cut into strips. Feeding them through the holder was tedious and error-prone.
Light leaks — excess light entered along the sides of the film, creating a faint vignette in the scans.
To help with the loading issue, I purchased the Optik Oldschool Film Killer, which allows me to cut my film after scanning. This way, I can work with full rolls for easier threading and keep strips neat for storage.
My Negative Supply Upgrade
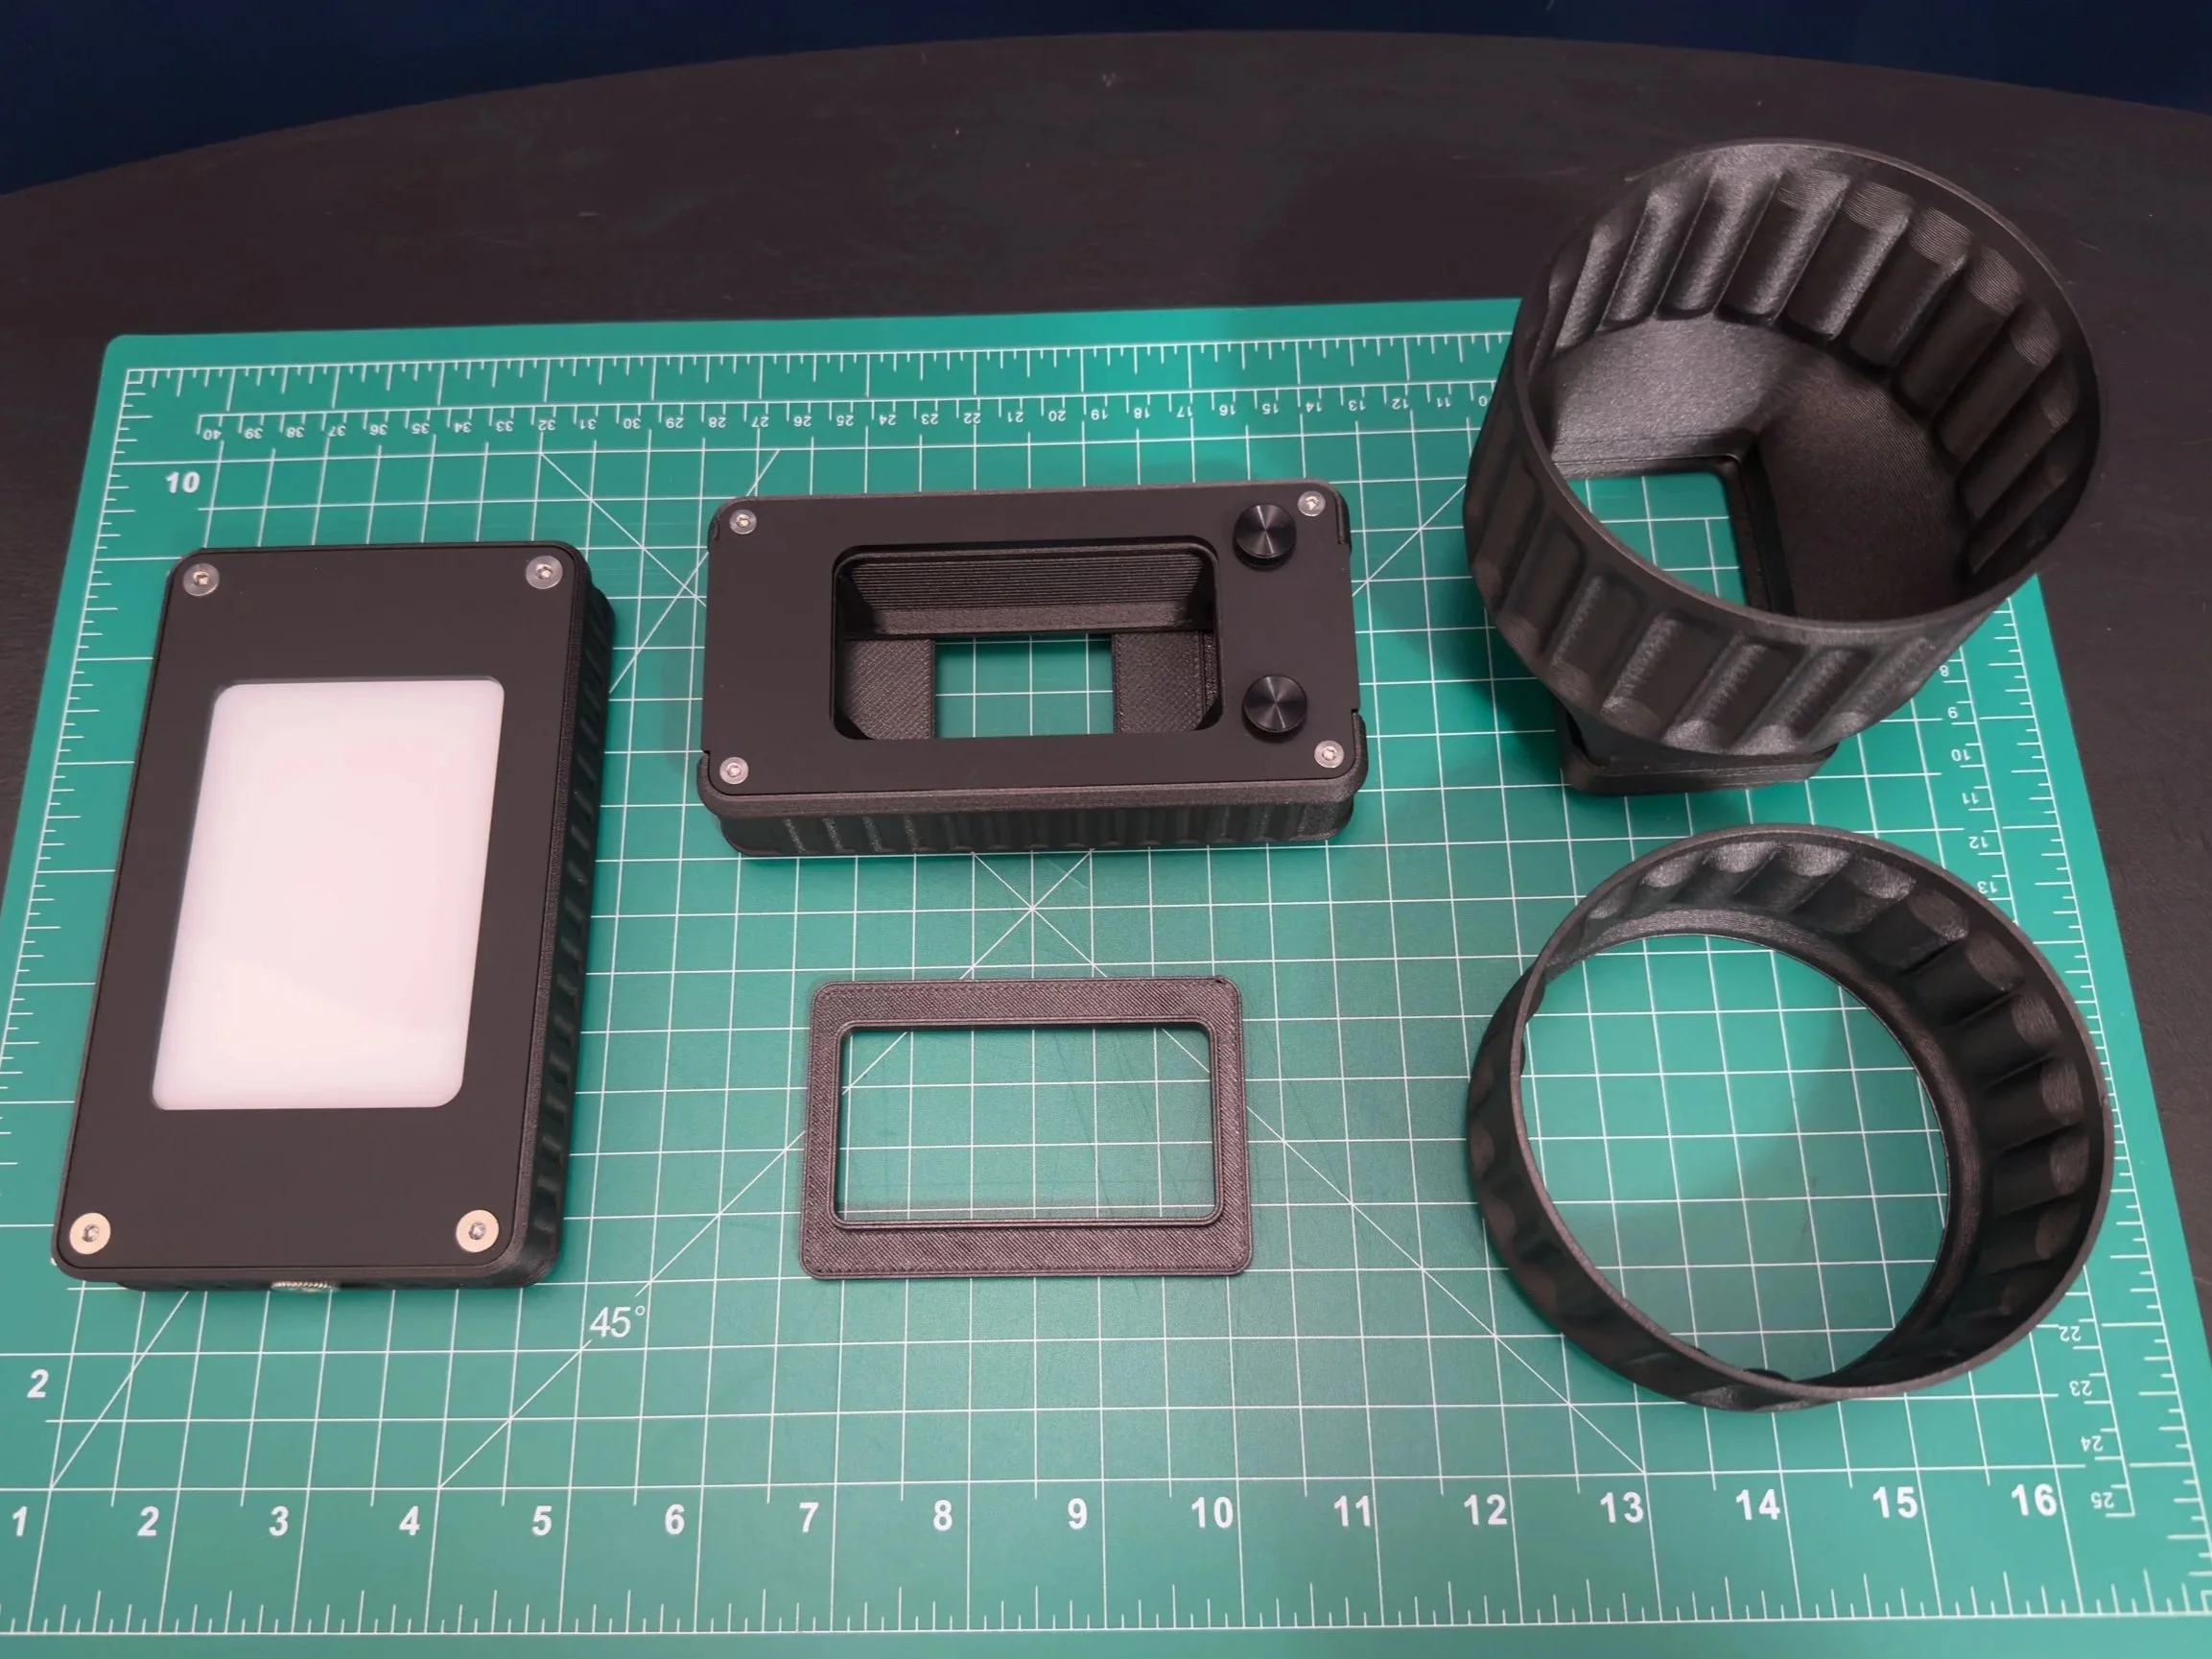
Left to Right: Light Source 35, Basic Film Carrier 35 MK2, Light Source Adapter, Film Scanning Hood.
I purchased the following gear from Negative Supply:
Light Source 35
Basic Film Carrier 35 MK2 for 35mm film scanning
35mm Film Scanning Hood (for Basic Film Carrier 35 MK2/Pro Film Carrier 35 MK2)
Light Source 35 Adapter for Basic Film Carrier 35 MK2
Why This Setup Is Better
The Light Source 35 is purpose-built for scanning and fits perfectly under the film carrier. Compared to my previous LED pad, it:
Has a smaller footprint, saving workspace.
Eliminates light leakage around the edges of the film.
Integrates seamlessly with the film carrier for stable alignment.
Immediate improvements I noticed:
Easier loading — smooth film movement, even in the dark.
Perfect flatness — negatives stay aligned with no curl or bowing.
Better light control — the scanning hood blocks stray light, allowing me to work with ambient lights on.
No Changes to My Stand or Camera
One of the best parts of this upgrade? I didn’t have to modify my copy stand or camera setup. My Nikon Z7II with the 55mm f/2.8 Ai-S Micro-Nikkor and PK-13 extension tube still sits on the same macro rail, ready to scan whenever I need it.
The workflow remained the same — only now, it’s faster, cleaner, and more consistent.
Final Thoughts
3D printed holders are a great entry point into DSLR film scanning, but if you want precision, speed, and durability, a commercial system like Negative Supply can dramatically improve your results. For me, it turned scanning from a careful balancing act into a smooth, predictable process — and that’s worth every penny.
Next up: I’ll walk through my complete DSLR scanning and conversion process using Negative Lab Pro.
— Steven
Hollyridge Photography
Follow us on Instagram or Facebook. Check our Print Shop for prints and our Etsy Store for digital downloads.